Posts

Assignment 3: Ferrari Front Bumper Relief Details

Image
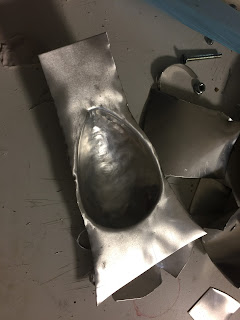
Tutorial - Ferrari Front Bumper Step 1: Mapping out the Shape from 3D Model or File Using the high resolution 3D Print (see Assignment 2) and direct measurements from the buck (using the middle piece as a centrepoint) map out the 5 shapes of the front bumper onto a piece of Aluminium sized to suit the flattened pattern of the bumper. Using a pencil draw on the aluminium 2 horizontal guidelines to match the upper and lower limits of the bumper. Step 2: Creating the Reliefs using Guides Guide Block: Using a piece of timber cut out a circle and square hole to match the drawings on the aluminium. [to make a square hole, drill out the 4 corners with a small drill and then use a chisel to gouge out the middle, the depth doesn't matter]. Clamp the aluminium to the guide block and place a blank block on either side of the intended relief area to avoid warping. Using a dowel and a square piece of timber (you may have to make these is if you cannot find

Assignment 2: The Ferrari 250 GTO

Image
Ferrari 250 GTO Hood and Bumper Assignment 1: The Hood Dividing the Buck After processing the STL file in Slicer for Fusion360 we carefully assembled our buck in order to ensure accuracy and precision. We held it together with small nails and tape. We also created a wooden base in order to achieve the curves on the underside of the some of the parts (front and rear fenders).  We masking tape to help us understand the curves and shapes of the car. This was also in an effort to split the car up in the best and most true to original way. This ended up not being sufficient so I 3D printed small models of the car with high detail to help understand the curves (see below). We used images of the car's manufacture in Italy and closeups of the unpainted body to split the car into 7 pieces.  We split the car based on aesthetic qualities as well as where we believe the car would have split lines due to functionality. For example, the door, the hood and the windows.  M
Image
I was so excited about the blister that I forgot to take photos until I started cutting it into the shape I wanted.  Nonetheless I managed to make a deep and uniform blister that I discovered would act perfectly as a mothers day gift for my mum (a spoon rest for next to the stove). The finished spoon rest. Yum.