Assignment 2: The Ferrari 250 GTO
Ferrari 250 GTO Hood and Bumper

Assignment 1: The Hood
Dividing the Buck
After processing the STL file in Slicer for Fusion360 we carefully assembled our buck in order to ensure accuracy and precision. We held it together with small nails and tape. We also created a wooden base in order to achieve the curves on the underside of the some of the parts (front and rear fenders).
We masking tape to help us understand the curves and shapes of the car. This was also in an effort to split the car up in the best and most true to original way. This ended up not being sufficient so I 3D printed small models of the car with high detail to help understand the curves (see below). We used images of the car's manufacture in Italy and closeups of the unpainted body to split the car into 7 pieces.


We split the car based on aesthetic qualities as well as where we believe the car would have split lines due to functionality. For example, the door, the hood and the windows.
My two pieces were the front hood and bumper with details including air intakes, lights and engine bump. My first piece (and the focus of this explanation) was the Hood with teardrop shaped bump (presumably for top of the engine), this also had 3 air inlets with a U shape from above and a shallow U shape from the front. I also took on the role of making a matching front bumper/grill with middle air intakes and 2 sets of lights (this was my focus for Assignment 3).
Starting the Hood

The hood's shape was similar to the reverse curve from the first half of the semester with an added bump, similar to the teardrop in Assignment 1. For this, I used the english wheel to achieve a convex curve to match the fall of the hood from the windscreen to the road. Then to make the middle bump I used a sandbag and combination of nylon hammers on metal dolley's.

As I had not yet 3D printed a model, I knew that the bump looked wrong but I did not know why. It fit nicely on the car but looked different to the images of the Ferrari from the internet.


I then decided to 3D Print two versions of the car as 10cm models. The first model was printed with a 0.4mm layer height (low resolution), and the second was printed with a 0.1mm layer height (high resolution). As seen in the image above, the high resolution print in black shows all the details of the model and was very useful for the whole team to understand the curves that the buck could not show. The low resolution print was very useful as it simplified the curves due to the low number of layers. This showed the intervals that made up the curves. For example the top of the hood had a large almost flat section. This appeared curved on the buck but the 3D print showed this as a large flat section. By counting the number of layers that make up the curves one could estimate the degree to which the curve needs to be adjusted relative to other parts of the car.


This led me to the conclusion that I needed to shrink the bump on the top and make it rise more towards the back. Using a small round piece of timber I gently hit the bump into a smaller profile.
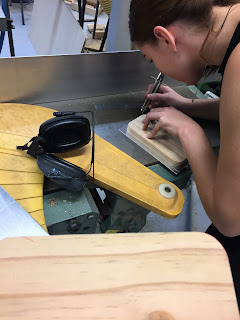
Making the Air Inlets


Using an appropriately sized chisel (and the approval of the workshop staff) I created three slits in the hood. I used the 3D model and the buck to estimate the location and spacing of these slits. I then carefully hammered the area in front of the slits to create a dip. This stretched the surrounding area so a U shaped support was made using MDF to keep the hoods overall curve. Looking back, it would have been more appropriate to make thee inlets first and then create the overall shape. The pulling of the metal to make the inlets required the overall shape to pull down. This was redeemed however a lesson was learned.


As seen in the final image, the 3 inlets are well spaced and look similar to the real car. I was very happy with the result. The piece was made oversize and then trimmed along with the surrounding pieces to create butting parts. The two fenders and front bumper sit neatly next to the hood, much like the real thing.
The Final Hood with its Neighbours


Comments
Post a Comment