Assignment 3: Ferrari Front Bumper Relief Details
Tutorial - Ferrari Front Bumper

Step 1: Mapping out the Shape from 3D Model or File


Using the high resolution 3D Print (see Assignment 2) and direct measurements from the buck (using the middle piece as a centrepoint) map out the 5 shapes of the front bumper onto a piece of Aluminium sized to suit the flattened pattern of the bumper.

Using a pencil draw on the aluminium 2 horizontal guidelines to match the upper and lower limits of the bumper.
Step 2: Creating the Reliefs using Guides

Guide Block: Using a piece of timber cut out a circle and square hole to match the drawings on the aluminium. [to make a square hole, drill out the 4 corners with a small drill and then use a chisel to gouge out the middle, the depth doesn't matter].


Clamp the aluminium to the guide block and place a blank block on either side of the intended relief area to avoid warping. Using a dowel and a square piece of timber (you may have to make these is if you cannot find them in the workshop), gently hammer the dowel into the circle shape and the square into the corresponding square shape.

Finish up the shape by using the appropriate tool with the sandbag as support.


As the shape is mirrored on the opposite side of the car, simply flip the guide block over and repeat for the other two headlights.
Using a bandsaw, cut out a rectangular shape to match the middle shape of the bumper.

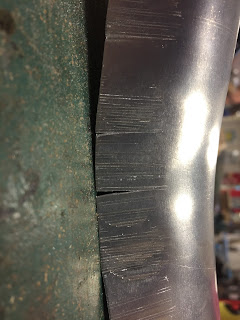
Much like before, align the aluminium sheet and clamp down to avoid warping. As seen in the image below, sometimes warping is unavoidable.

To straighten out the warping, use a thin flat piece of timber on a flat surface with the bumper facing down.

Step 3: Bending the Outer Rim


Constantly check the angle of the top edge so that it sits snuggly on the buck, and under the hood. Once you are happy start to bring the edges around to meet. Using a sharp timber support, create the side edges to fit under the two fenders.


Step 4: Fitting to the Car
As the aluminium is soft due to annealing simply twist and tweak the shape to fit under the other pieces. As seen in the left photo the hood fits on top of the bumper with a close gap.


Reflection - Relief Bumper in the context of Conceptual Product Designs
Depressed Metal Product Designs

I am in my final year of Industrial Design. This course has helped me to understand metal better and how materials work when exposed to different forces. Although beyond the scope of this course I wanted to share the models I made for my Final year studio. I made 4 aluminium models to represent the possible shapes of an adaptive sofa. Below are some images of these models.


To who ever is marking this.... thank you for an enjoyable semester and see you around the workshop!

Comments
Post a Comment